
Gridea让你更方便地管理GitHub Pages
前言
当下大多数人可能已经对GitHub Pages不再陌生,它是很多喜欢写文章的人第一次接触的用于免费搭建博客建一个简洁却又不失优雅的个人博客 ,直到现在互联网上还有大量的基于它的个人博客,也有大量的搭建方法的教程。我之前就在少数派发表过一篇详细的GitHub Pages搭建教程,尚未掌握的朋友可以先从这篇文章读起。
然而搭建虽然简单,但是管理和推送文章却相对麻烦不少,在官方的教程里,我们需要经历繁琐的步骤才能发布一篇文章和修改个人空间界面。相较于官方提供的GitHub Desktop和在终端使用Git的方法管理GitHub Pages,Gridea这款工具则更为的便捷和优雅,它能让作为创作者的你更专注于写作 。
简介
Gridea是一个静态博客写作客户端,帮助你更容易地构建并管理博客或任何静态站点。
Gridea最早叫Hve Notes,开发者为了更易读和好记,重新命名为Gridea,支持Windows和Mac平台,它的基础界面非常地小清新。
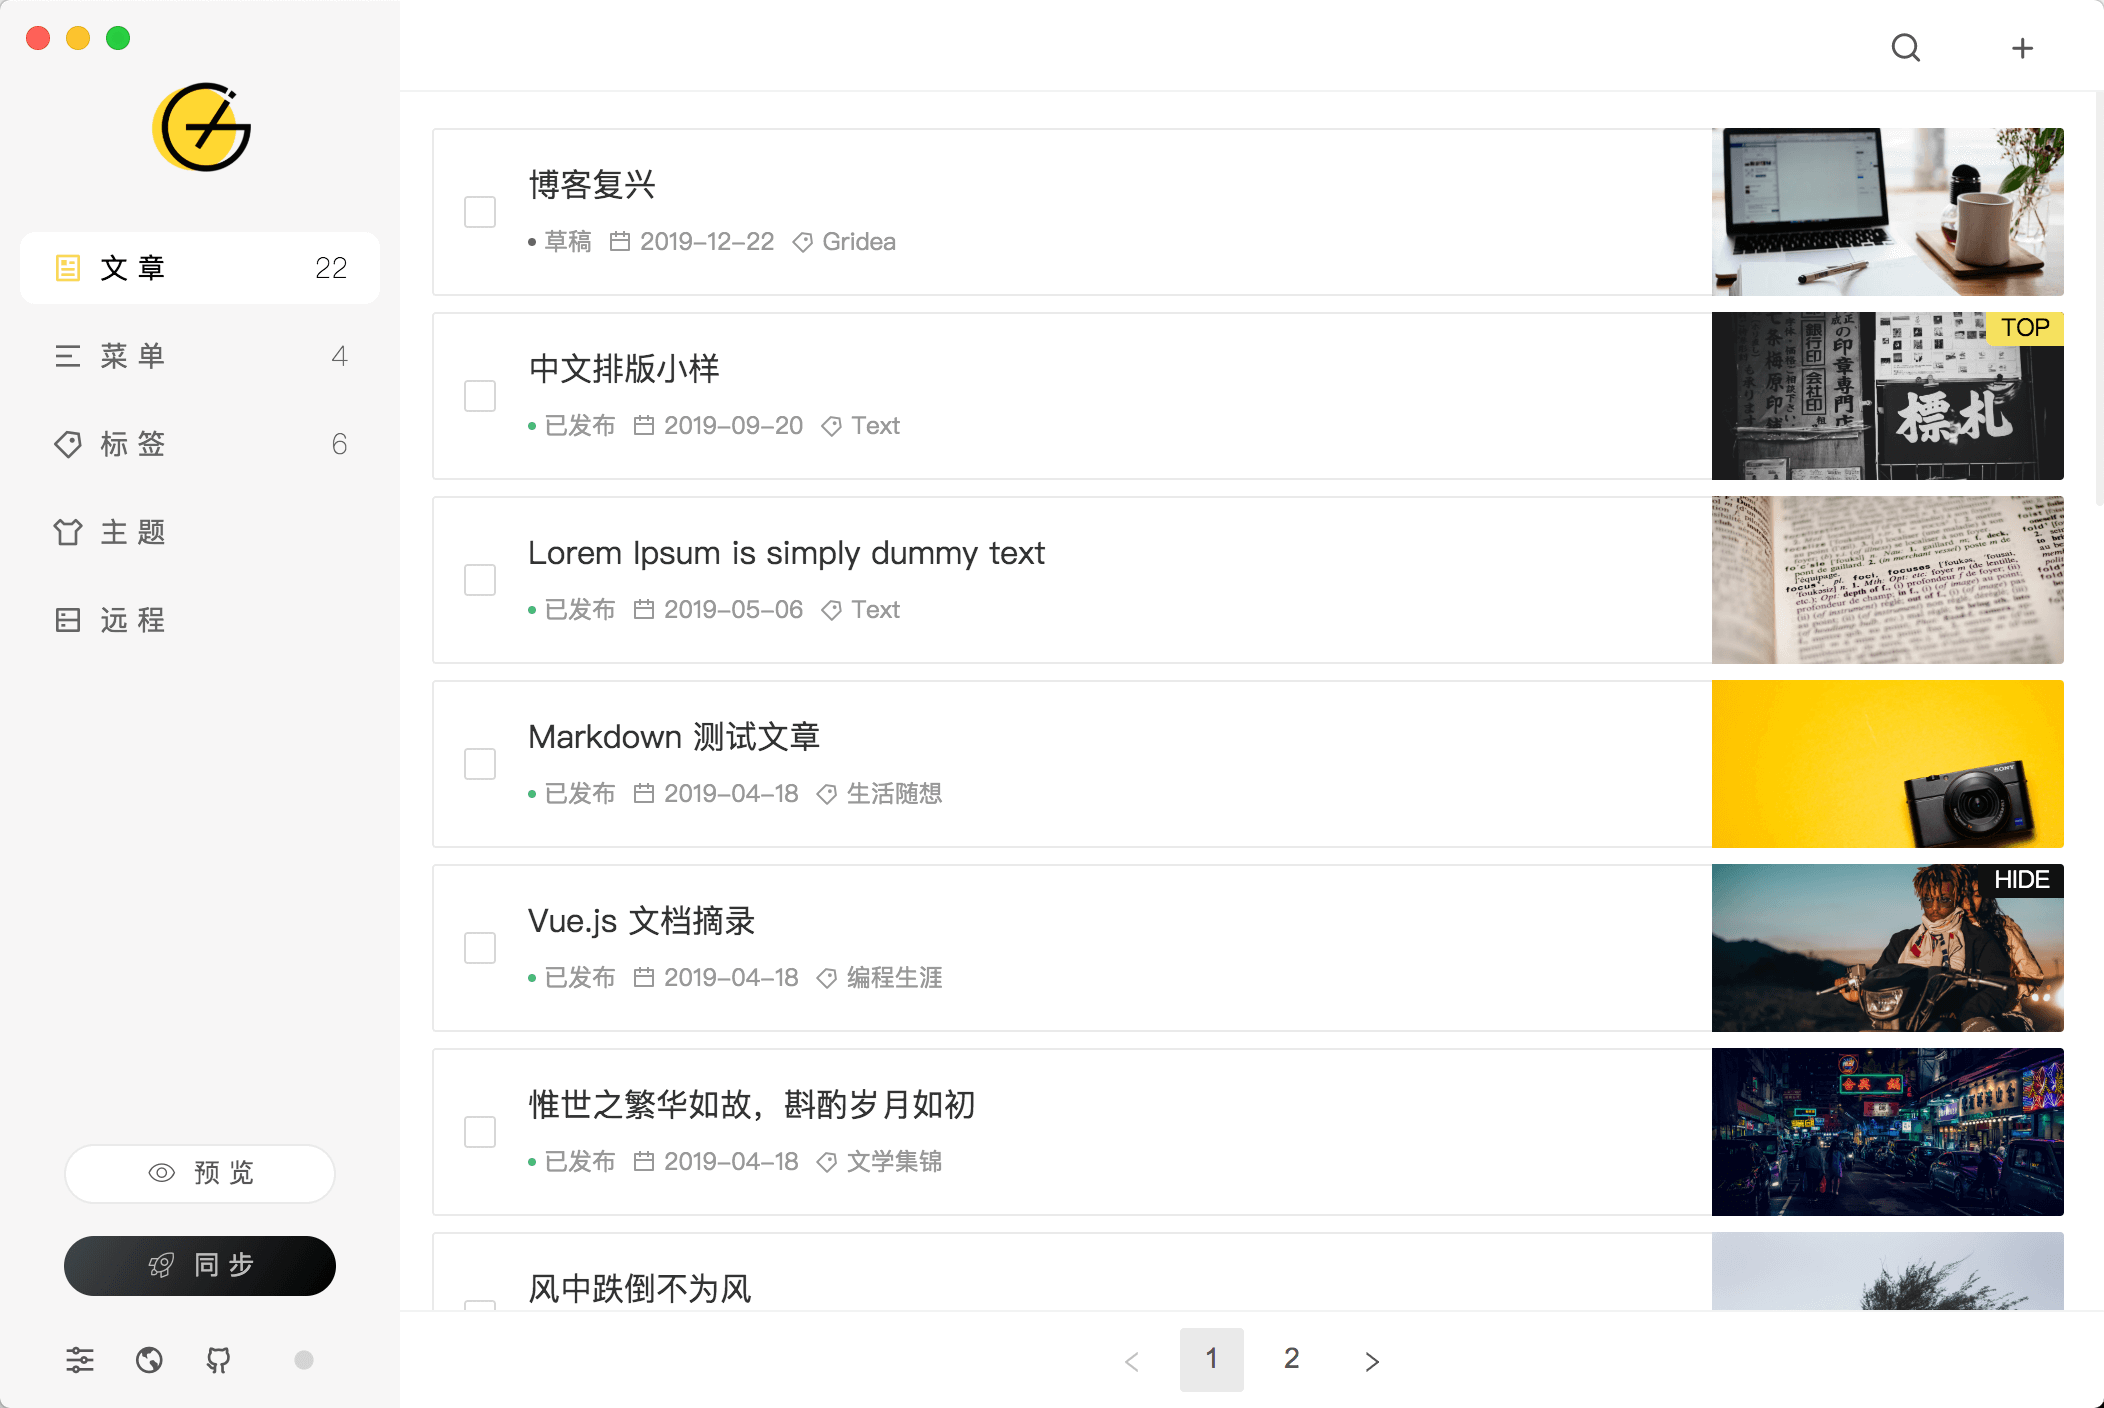
官网 - https://gridea.dev/
GitHub - https://github.com/getgridea/gridea
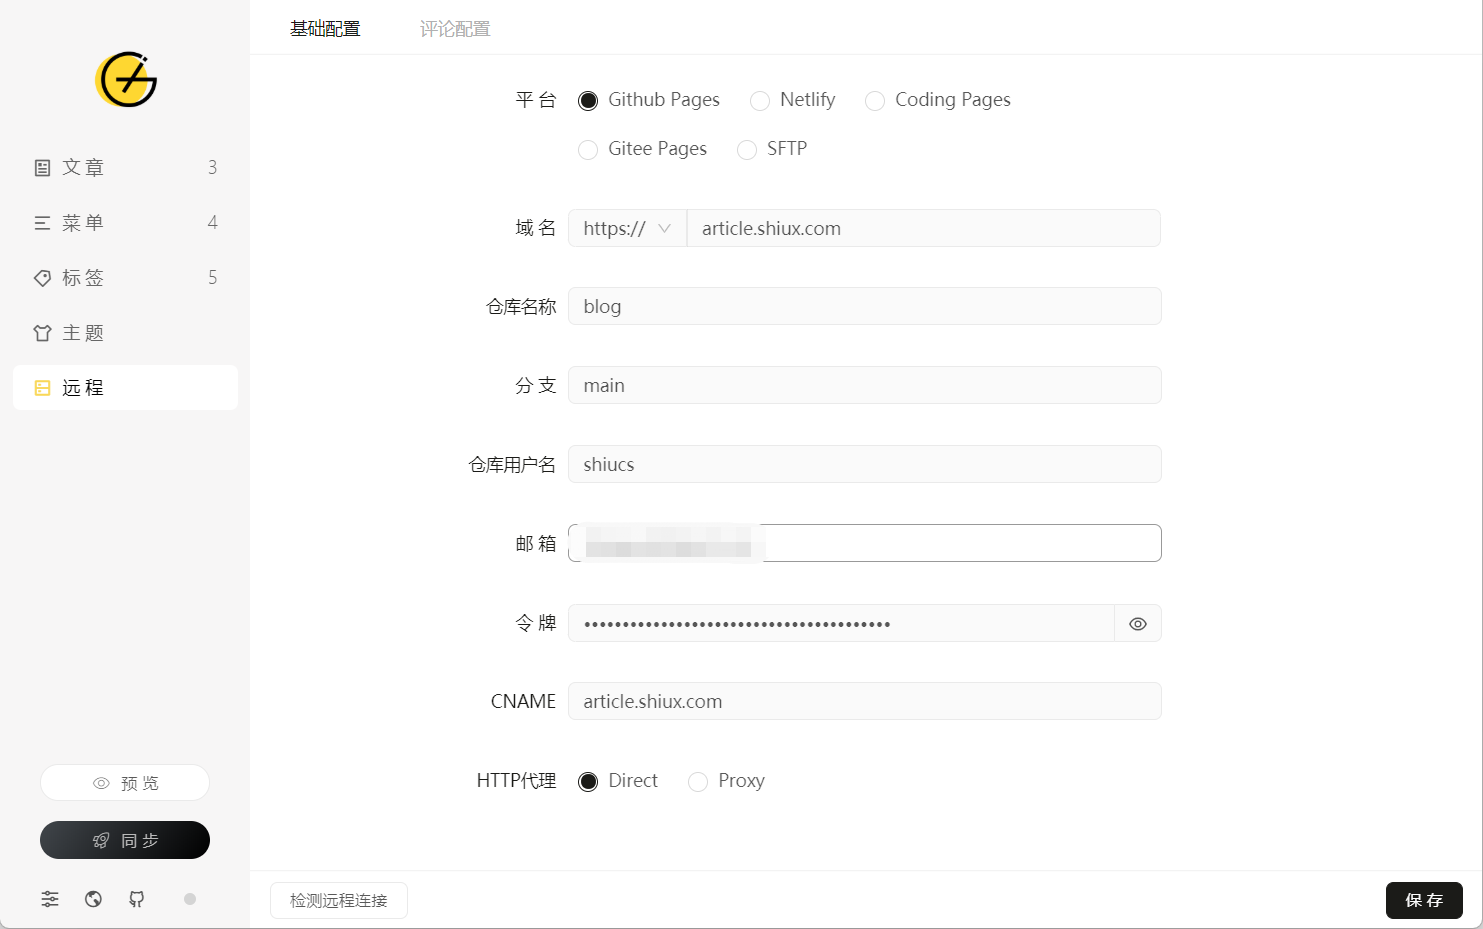
第一次使用它需要你进行应用的初始化配置,才能让他和GitHub Pages连接,配置很简单,可以参考下面的方法进行配置:
- 域名:GitHub Pages对应的域名(例如:
https://shiux.github.io或https://shiux.com) - 仓库:你的静态文件存放的仓库(例如:
blog) - 分支:你的GitHub Pages对应的分支(例如:main)
- 用户名:仓库所属用户的用户名(通常就是你的GitHub账号的昵称)
- 邮箱:Git推送时使用的邮箱(通常就是你的GitHub账号的邮箱)
- Token: Git推送时需要的Token用来向GitHub提交构建后的文件GitHub personal access tokens
- CNAME: 可通过这个选项配置你自己的域名(例如:
shiux.com)
注册并解析域名
注册个域名,国内的域名需要备案等操作。
你可以在下方网站注册域名:
GoDaddy - https://hk.godaddy.com/
Hostinger - https://www.hostinger.com.hk/
添加解析记录
添加CNAME(别名)
主机blog
指向<user>.github.io或<organization>.github.ioNavigate to your DNS provider and create a CNAME record that points your subdomain to the default domain for your site. For example, if you want to use the subdomain
www.example.comfor your user site, create a CNAME record that pointswww.example.comto <user>.github.io. If you want to use the subdomainanother.example.comfor your organization site, create a CNAME record that pointsanother.example.comto <organization>.github.io. The CNAME record should always point to <user>.github.io or <organization>.github.io, excluding the repository name. For more information about how to create the correct record, see your DNS provider’s documentation. For more information about the default domain for your site, see “About GitHub Pages.”在GitHub Pages设置中进行自定义域名绑定
打开GitHub Pages,进入设置页面,为网站绑定自己的域名。添加刚才解析的记录,如下图所示: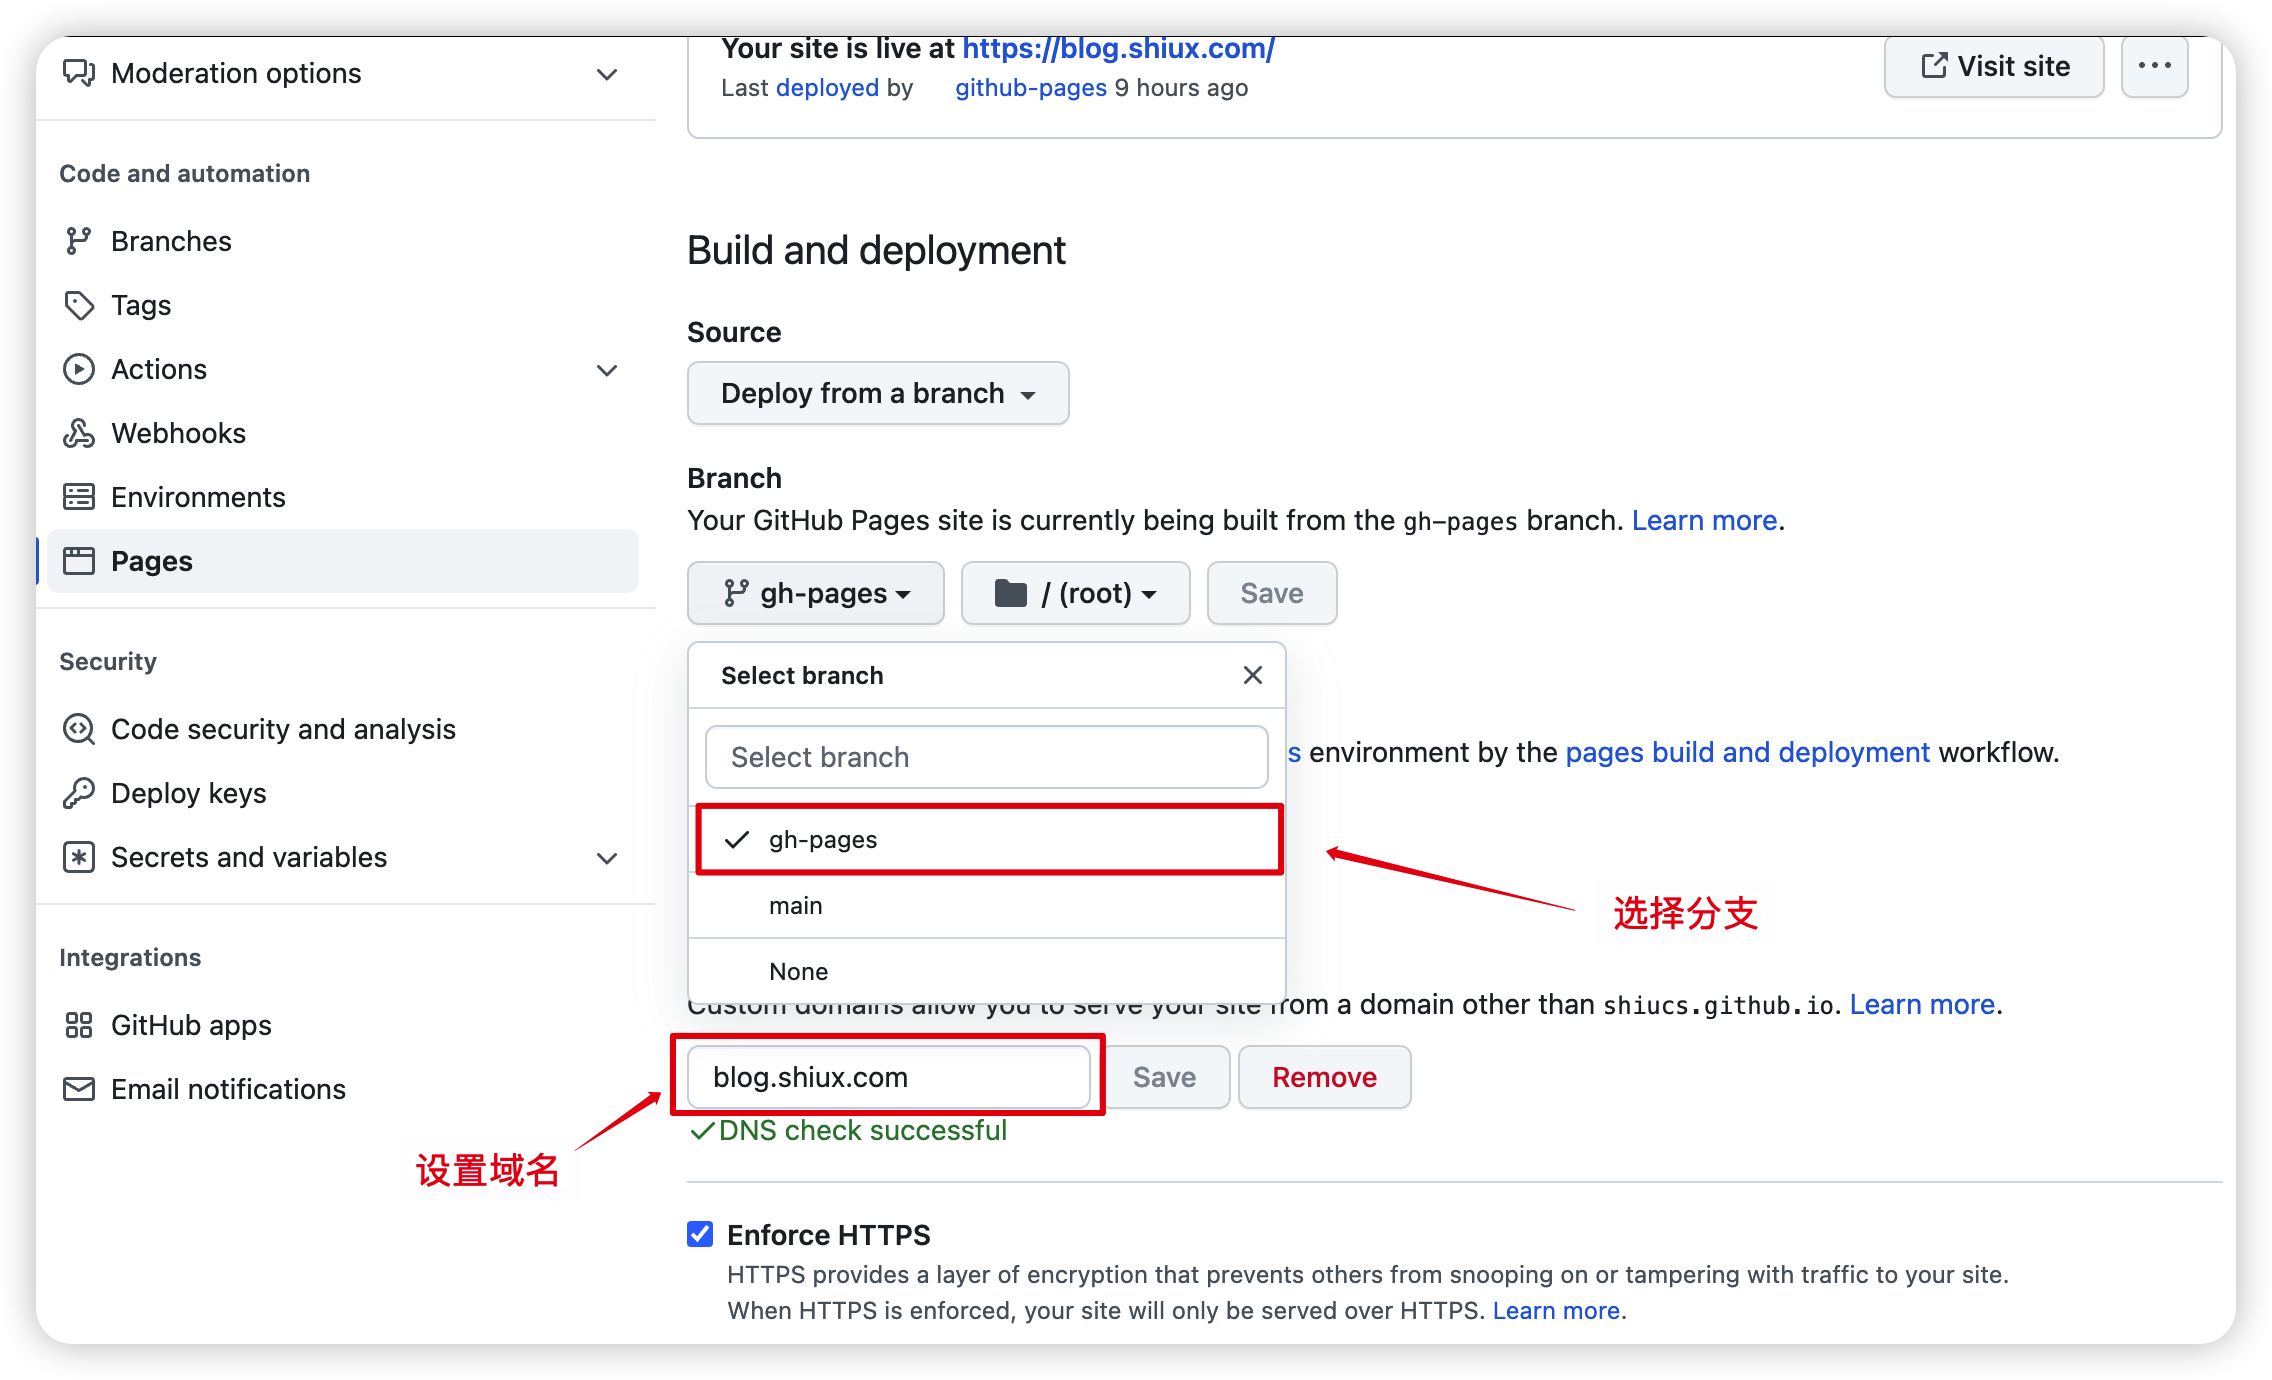
为了安全,记得开启强制Enforce HTTPS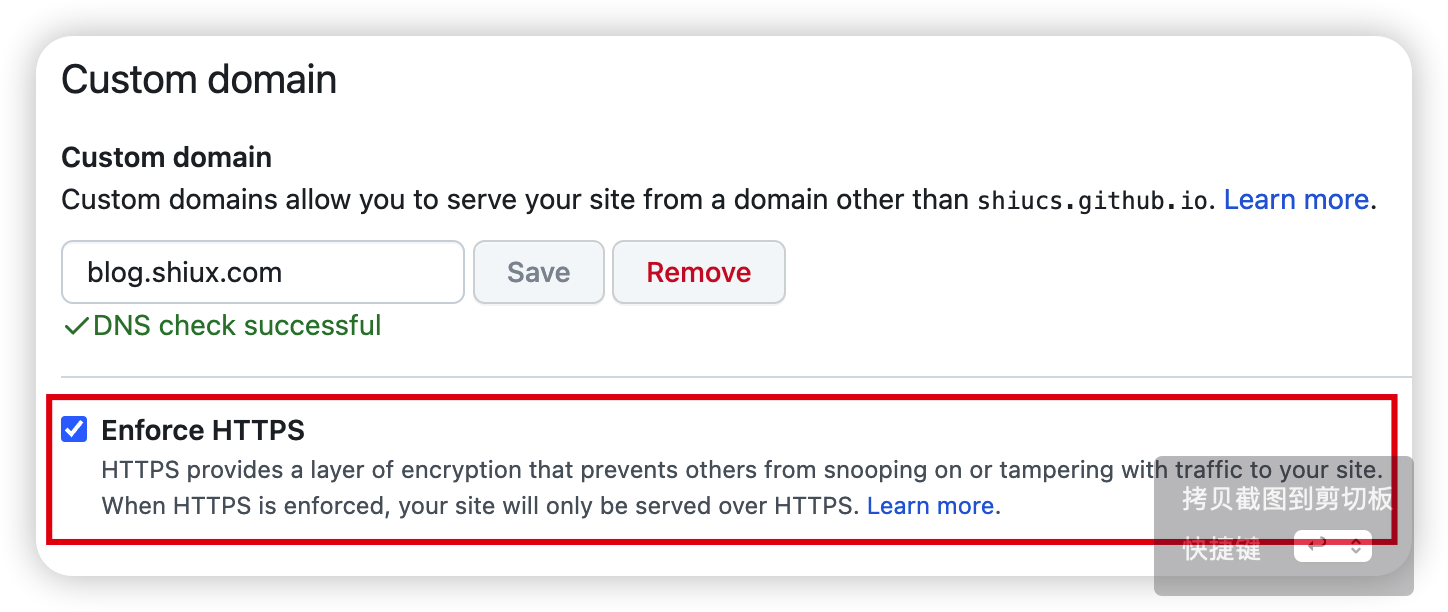
下载安装 Gridea
客户端下载地址: https://gridea.dev/
下载安装过程不做说明
- 设置代码本地目录
点击此处设置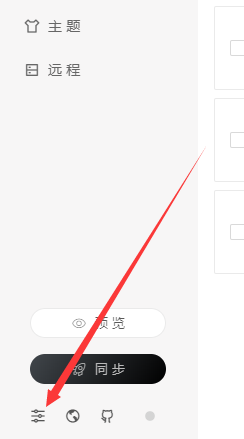
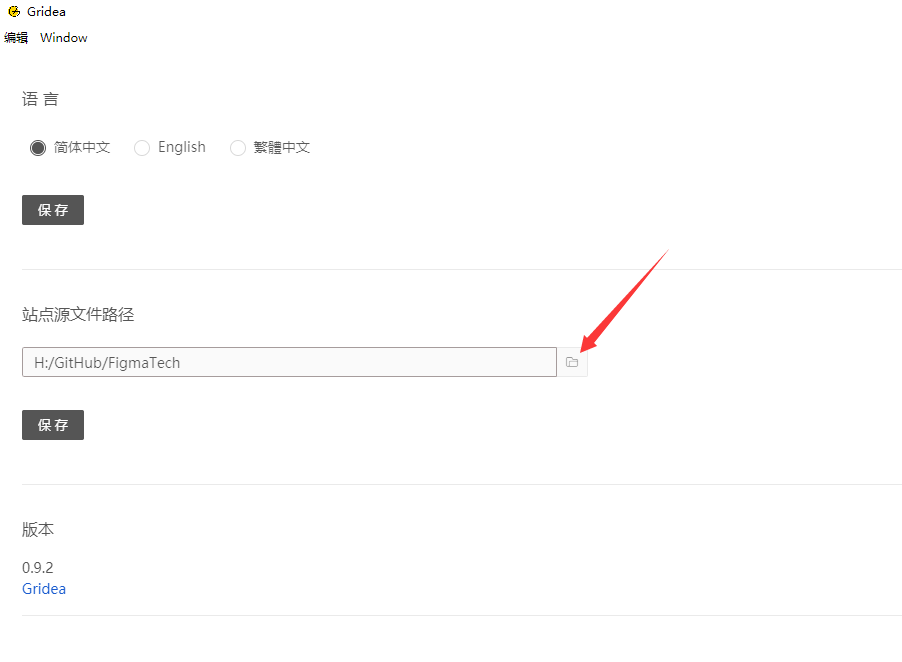
- 设置远程服务
点击"远程", 然后选择 “Coding Pages”
按页面提示填写保存后, 点击检测远程链接